Improve the contact form on your website: 5 simple tips

It will give you more insights and allow you to better optimize your campaigns.
That will get you more leads and less cost!
High time to tell you all about it.
The LinkedIn Insight Tag, also known as LinkedIn Pixel, is a piece of code that you can add to your website for the purpose of learning more about the effectiveness of your ads, your target audience and to enable remarketing
It's a piece of Javascript that you must place within each page of your website that causes a cookie to be left in your visitors' browsers. Obvious right?

Basically, the LinkedIn Pixel primarily provides more insight.
The benefits of the LinkedIn Pixel are:
This ensures that:
So only benefits!
LinkedIn itself has perfectly explained how to set up conversion tracking within its platform.
You can find that explanation here.
But then you still need to add the LinkedIn Insight Tag to your website.
I'll explain to you now how that works.
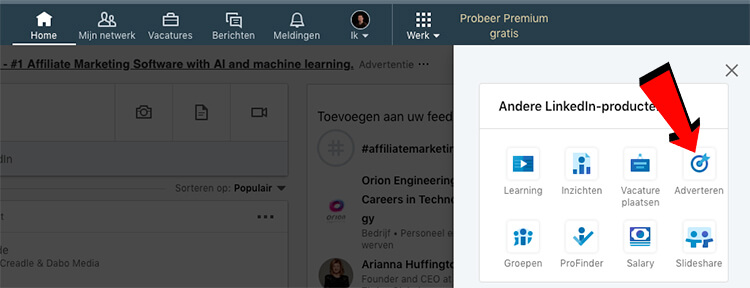
Step 1: In LinkedIn, click on the 9 cubes in the upper right corner that say "work," then click on "Advertise.

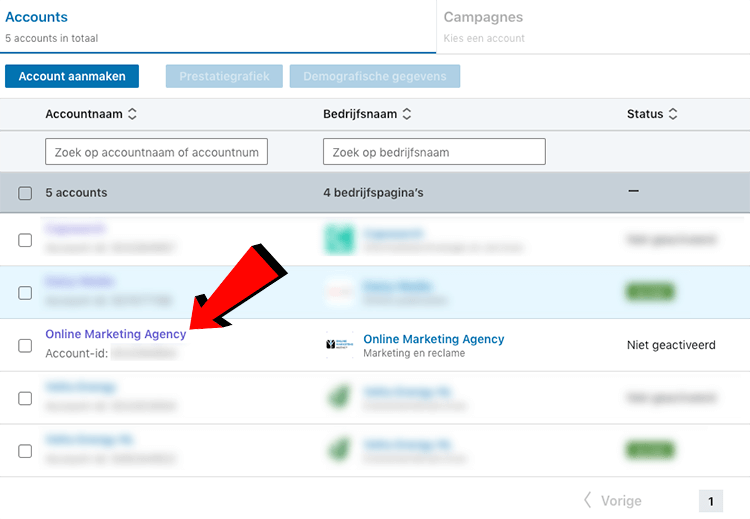
Step 2: Select the account where you want to install the LinkedIn Pixel

Don't have an account within your campaign management yet?
Then create those first.
Step 3: From the menu bar, click on "Assets" and then "Insight Tag.
Step 4: Click on "View Insight Tag.
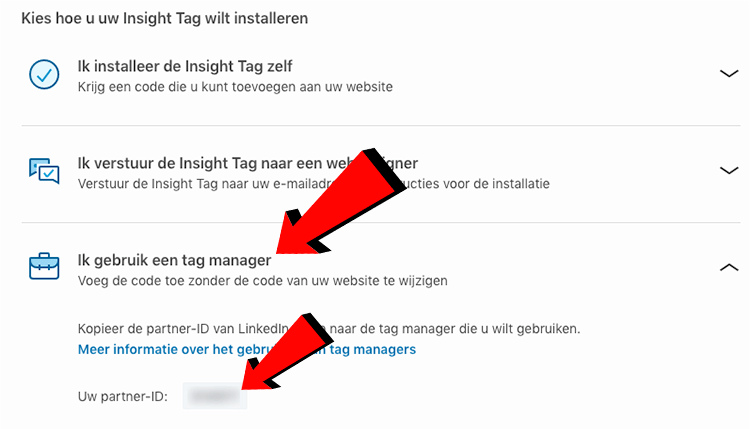
Step 5: Select 'I use a tag manager' then copy your partner ID.

Step 6: Login to Google Tag Manager(https://www.google.com/intl/nl/tagmanager/)
If you don't have Google Tag Manager yet, I first recommend following the steps in the Step-by-Step for installing Google Analytics via Google Tag Manager.
Step 7: Within the appropriate container, click "New Tag.
Step 8: Change 'Unnamed tag' to 'LinkedIn Pixel', for example.
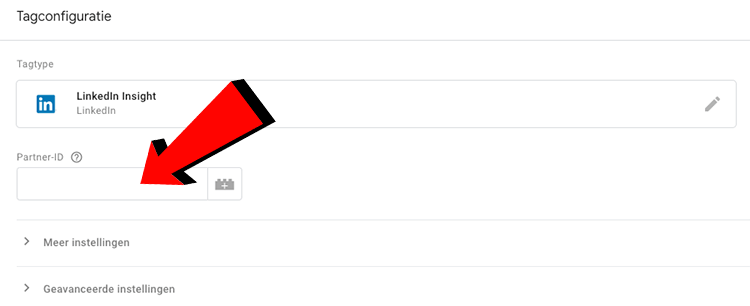
Step 9: Click on the top box of 'Tag Configuration' and then look for the 'LinkedIn Insight' tag.

Step 10: Click on 'LinkedIn Insight' and then paste your partner ID in the space provided.

Step 11: Click on the bottom box marked "Triggers," select "All Pages," and then click "Save" in the upper right corner.
Step 12: Click "Submit" in the upper right corner, then "Publish," then "Continue.
Step 13: Test that the LinkedIn Insight Tag works by turning on the preview mode.

Step 14: If you have gone through all the steps correctly and the preview mode is on, you can visit your website and see that the LinkedIn Pixel tag has fired.

'But surely I can download a plugin to install the Pixel, which is much easier and faster, right?'
It's simpler and faster, but again, the easy way.
And that, as you know, is not always the best.
The more plugins your website contains, the slower your website becomes and thus the worse findable you are.
In fact, load speed is an important On Page SEO element.
"But surely I can manually add LinkedIn's script to my website's code?
That too is an option, but the more scripts your website contains ...
... the slower your website becomes.
And you know by now what that means ;).
Unfortunately, there is no handy tool today that can check if you have the Pixel properly installed on your website.
So the best way to check that it's all working is to use the preview mode within Tag Manager and by looking in LinkedIn's campaign management to see if any data is coming in.
Written by: Daniel Kuipers
Daniel is the founder of Online Marketing Agency. He constantly scours the Internet for the latest gadgets and tactics and blogs about them in understandable language. Well, sometimes.